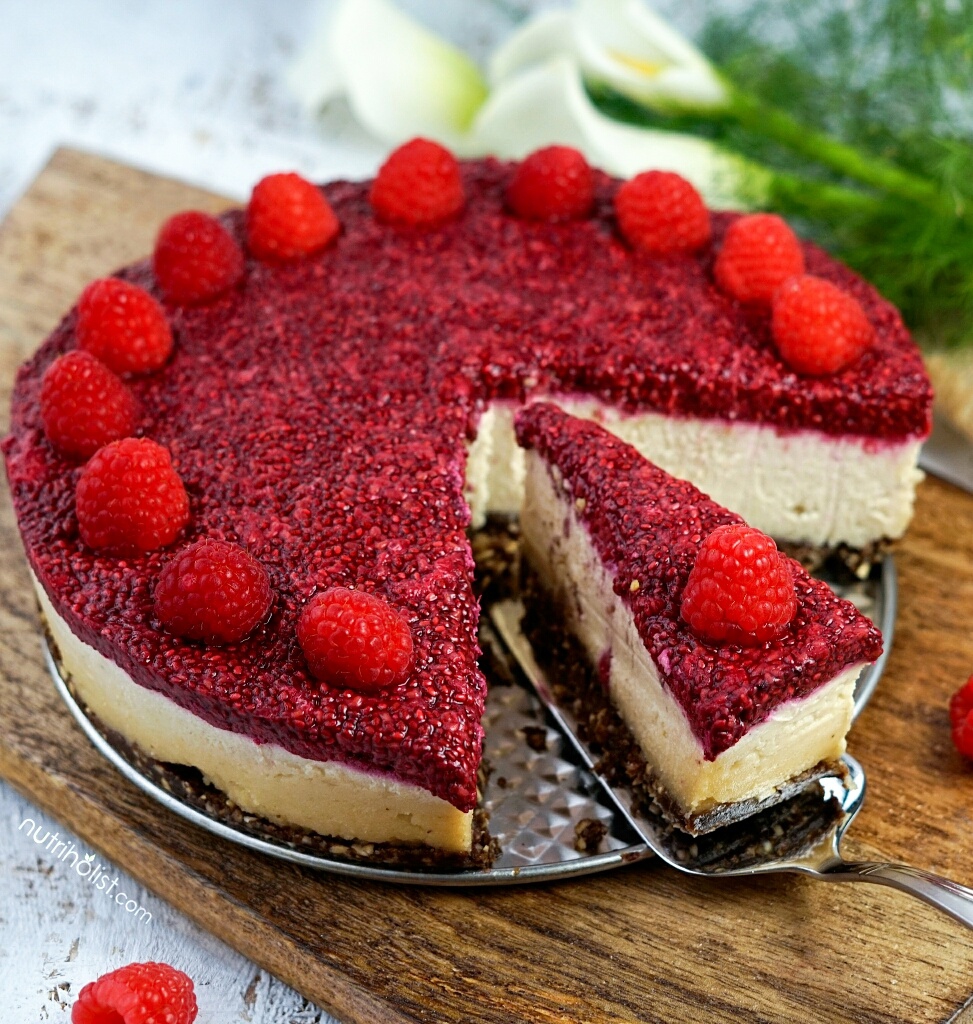
This Raspberry Chia Cheesecake is a delightful, healthy dessert made with dairy-free, gluten-free, and refined sugar-free ingredients. It requires no baking and is very simple to prepare. Visually stunning and irresistibly delicious, it’s sure to impress both your taste buds and your guests. It’s the perfect dessert to elevate any occasion.
I’ve got something truly special to share with you today. It’s a recipe for a No-Bake Raspberry Chia Cheesecake that’s not just incredibly delicious but also surprisingly good for you. We’re talking about a dessert that’s dairy-free, gluten-free, and has no refined sugar in sight.
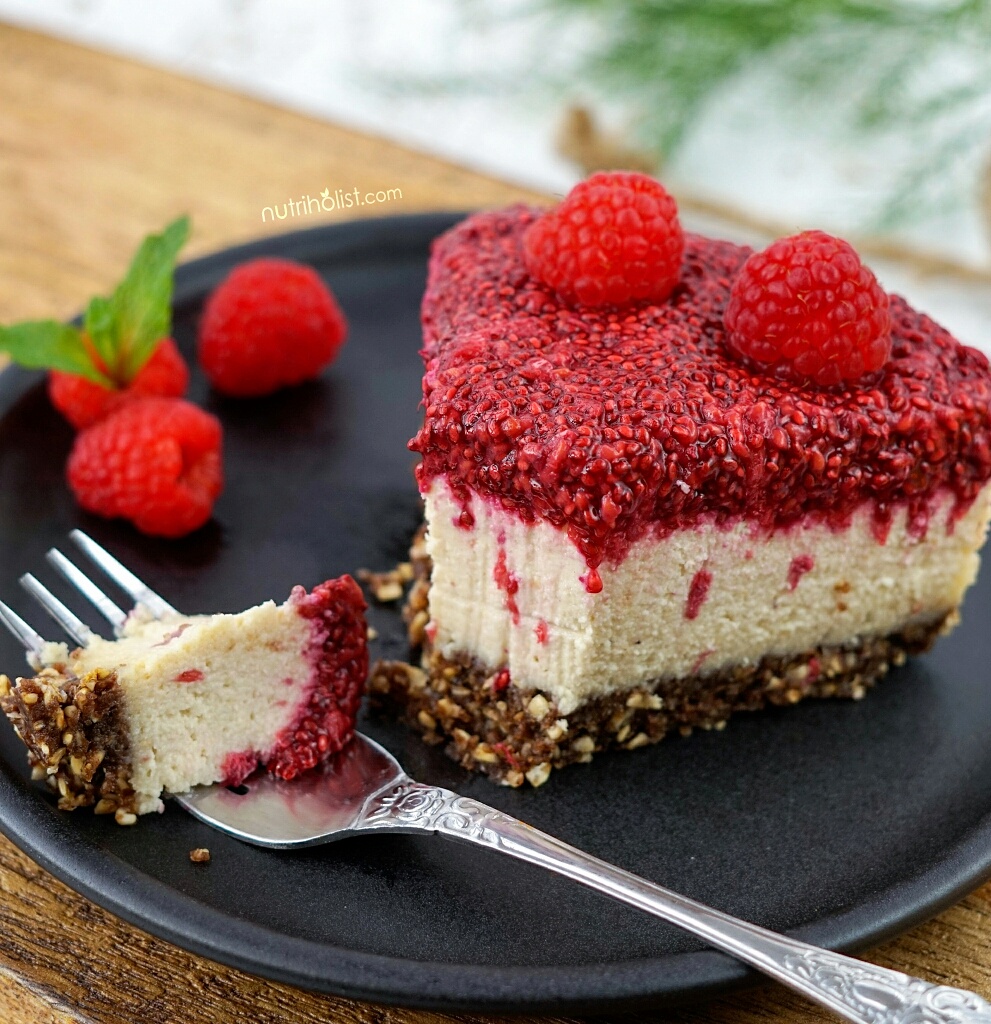
What I love most about no-bake dairy-free and gluten-free desserts is that they are quite heavy and filling, since they are mostly made up of nuts and whole grains. Therefore, they fill you up rather quickly and are difficult to overeat, given you’ve had proper meals throughout the day. They provide good fats and complex carbs our bodies need to thrive, keeping us satiated and our blood sugar stabilized. So, without further ado, let’s jump right into the world of this mouthwatering Raspberry Chia Cheesecake!
Ingredients in Raspberry Chia Cheesecake
Crust:
- Dates: They provide natural sweetness and act as a binding agent.
- Walnuts: Walnuts offer a nutty and crunchy texture to the crust; try almonds or pecans as alternatives.
- Oats (rolled or steel-cut): Oats add texture with a mild flavor and are gluten-free; regular oats work if you’re not gluten-sensitive. You can use raw buckwheat groats instead if you can’t have oats.
- Coconut oil: Coconut oil lends a subtle coconut flavor and helps hold the crust together.
- Raw cacao or carob powder: Raw cacao powder or carob powder adds a chocolatey touch; you can leave it out if you don’t care for a chocolate flavor.
Cheesecake Filling:
- Soaked cashews: Cashews create a creamy, dairy-free cheesecake base. Soak them for at least 2 hours (or 15 minutes in boiling water) if using a regular blender or food processor for a silky smooth texture. You can skip the soaking step if using a high-powered blender like a Vitamix.
- Lemon or lime juice: Adds a subtle zesty, tangy flavor to the filling.
- Pure maple syrup: Provides natural sweetness; raw honey can be an alternative.
- Almond or coconut milk: Enhances creaminess; choose any plant-based milk you prefer. I like to use canned coconut milk with 2 ingredients (coconut and water) or homemade or storebought nut milk without any sweeteners, additives, or preservatives.
- Coconut oil: Adds creaminess and helps set the cheesecake when chilled.
- Vanilla extract: Provides that classic vanilla flavor. Use 2 tsp pure vanilla extract or 1 tsp vanilla bean powder.
Raspberry Chia Layer:
- Raspberries (fresh or frozen): Raspberries give this layer its vibrant color and fruity flavor; you can swap them with your favorite berries.
- Pure maple syrup: Sweetens the raspberry layer naturally; raw honey can be an alternative.
- Chia seeds: Chia seeds thicken the raspberry sauce and offer nutritional benefits. If you’re not a fan of chia seeds, you can omit them and use 1 teaspoon of agar powder to thicken instead.
How to Make Raspberry Chia Cheesecake:
Now that we’ve got our lineup of wholesome ingredients ready, let’s dive into the exciting process of crafting this Raspberry Chia Cheesecake. Don’t worry; it’s a lot simpler than it may seem. We’ll break it down step by step, ensuring you create a dessert masterpiece that’s both delightful and healthy.
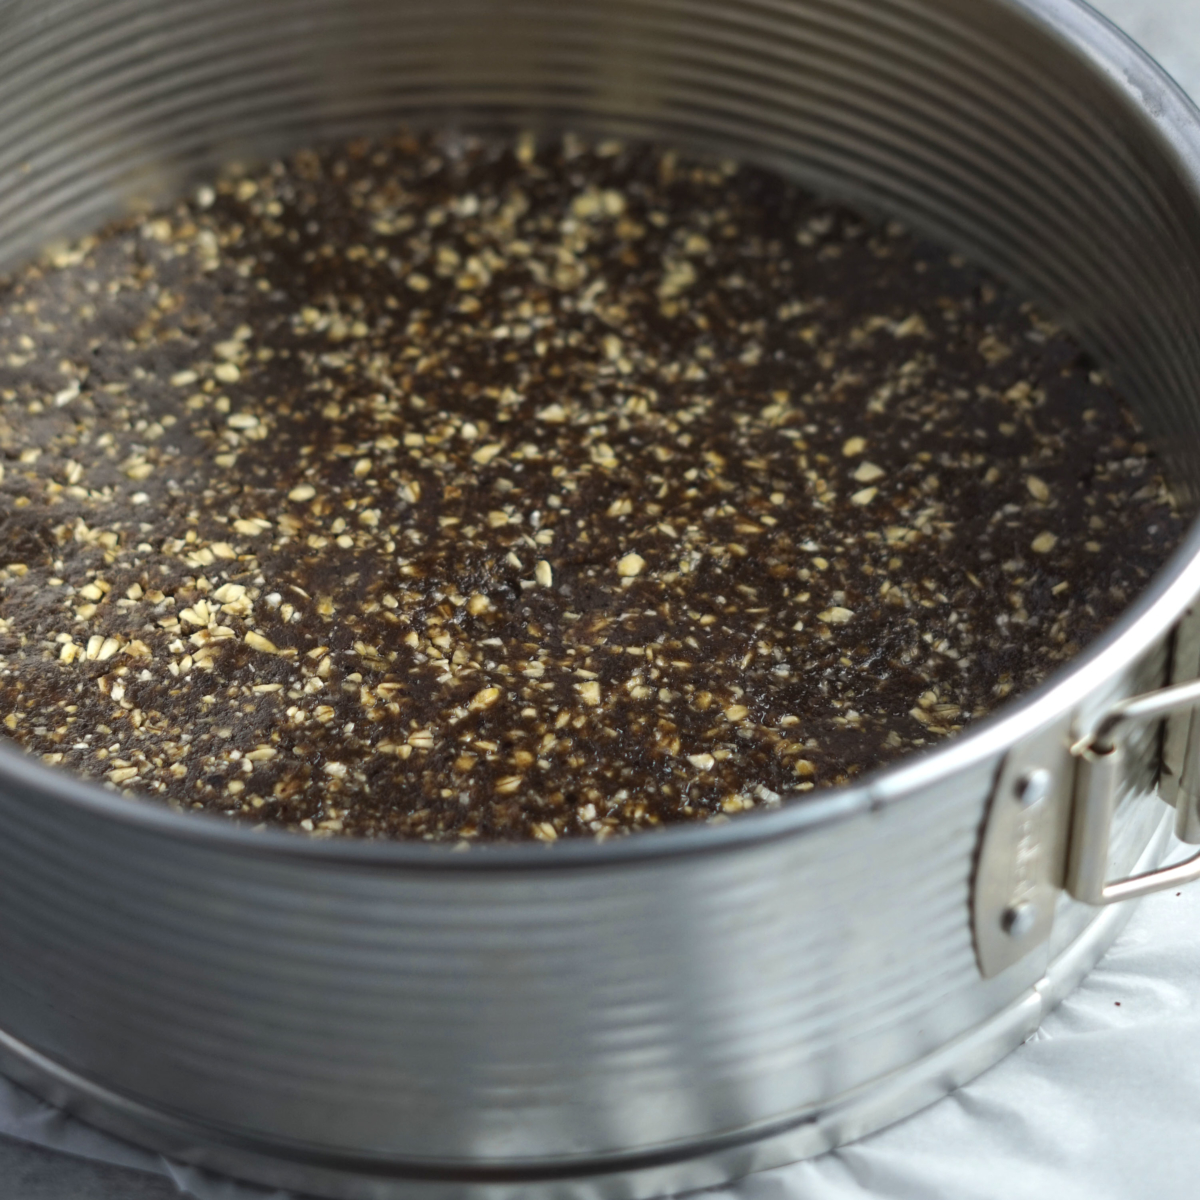
- Start by preparing the crust. In a food processor, combine the pitted dates, walnuts, gluten-free oats, coconut oil, and raw cacao or carob powder. Blend until you have a sticky, crumbly mixture. Next, line a 7-inch spring-form pan with parchment paper and press this mixture evenly onto the bottom. Pop the pan in the freezer while you move on to the next step.
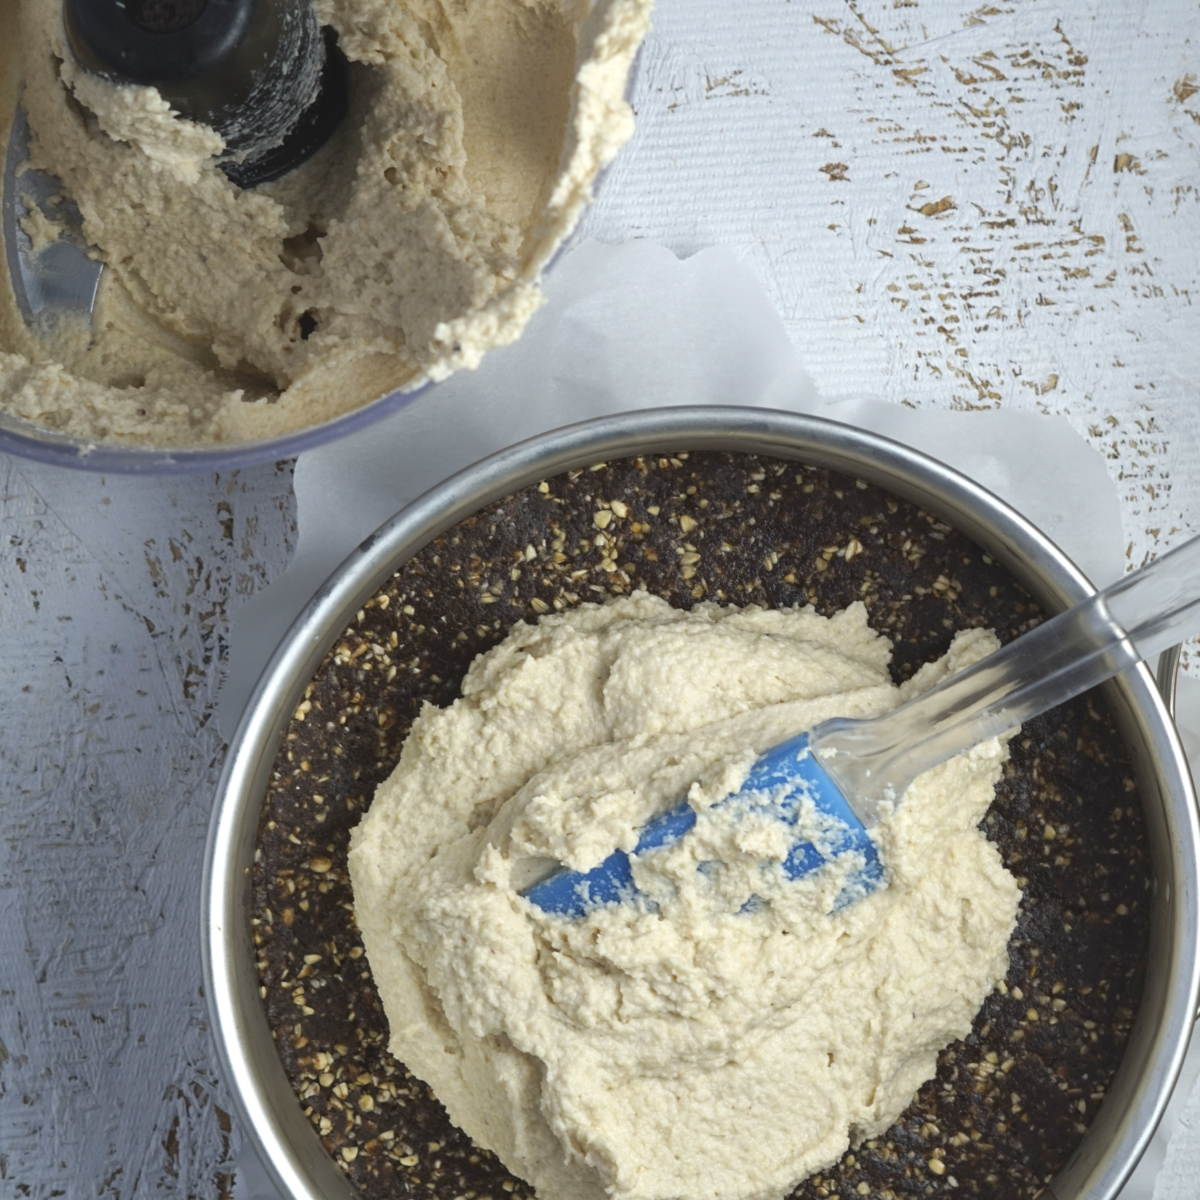
- Make the Cheesecake Filling: Rinse and drain the soaked cashews, and toss them into a food processor or high-speed blender along with the lemon or lime juice, pure maple syrup, almond or coconut milk, coconut oil, and vanilla extract. Blend this mixture until it becomes incredibly smooth, creating a creamy and dreamy cheesecake filling. Once done, pour this luscious filling over the prepared crust in the pan. Place back in the freezer.
- Prepare the Raspberry Chia Layer: In a small pot over medium-low heat, add the fresh or frozen raspberries. Let them simmer for about 2-3 minutes until the raspberries are soft and the mixture starts to thicken. Once done, remove it from the heat and stir in the chia seeds and maple syrup until the mixture thickens further. Allow it to cool down.
- Assemble: Now, let’s bring all the delicious components together. Take your prepared crust with the cheesecake filling from the freezer and spread the raspberry chia layer evenly on top. This vibrant layer not only adds a burst of flavor but also a delightful texture. Once you’ve evenly layered the raspberry goodness, place the cheesecake back into the freezer for an additional 2 hours to set everything beautifully. Before serving, don’t forget to decorate with some fresh raspberries to add that final touch of elegance and freshness.
How to Store Raspberry Chia Cheesecake
Ensuring your Raspberry Chia Cheesecake stays fresh and delicious is essential for enjoying every last bite of this delightful dessert. Whether you’re planning to savor it over several days or save some for later, here’s how to store it properly.
If you intend to consume your cheesecake within the next week, the best place to keep it is in an airtight container in the fridge. This will help maintain its creamy texture and preserve its flavors.
However, if you’re making this cheesecake ahead of time or want to save some for future indulgence, freezing is your best bet. Place it in an airtight container and store it in the freezer for up to 3 months. When you’re ready to enjoy it, allow the cheesecake to thaw in the fridge overnight.
With the right storage methods, you can relish your Raspberry Chia Cheesecake whenever the craving strikes, whether it’s a few days or even months down the road.
More No-Bake Cheesecake Recipes
- Matcha Lime Vegan Cheesecake
- Sweet Potato Chocolate Cheesecake
- Mango Vegan Cheesecake
- Pumpkin Mousse Cake
Hope you get to try this recipe and enjoy it as much as we did. If you do, please leave a comment and rate the recipe. Don’t forget to tag your photo @nutriholist #nutriholist on Instagram or share a picture on our Facebook page. We love seeing your creations!
Raspberry Chia Cheesecake
Ingredients
Crust
- 1/2 cup dates pitted
- 3/4 cup walnuts Sub: almonds or pecans
- 3/4 cup gluten-free oats rolled or steel-cut
- 1 tablespoon coconut oil
- 1 tablespoon raw cacao or carob powder (optional)
Cheesecake Filling
- 3 cups cashews soaked for 2+ hours {See Notes}
- 1 lemon or lime juiced
- 1/4 cup pure maple syrup
- 1/8 cup almond or coconut milk unsweetened
- 4 tablespoons coconut oil
- 2 teaspoons vanilla extract
Raspberry Chia Layer
- 2 cups raspberries fresh or frozen (or other berries of choice)
- 2 tablespoons pure maple syrup
- 4 tablespoons chia seeds {See Notes}
- Fresh raspberries to decorate
Instructions
- For the Crust: Blend all crust ingredients in a food processor until a sticky, crumbly mixture forms. Line a 7-inch spring-form pan with parchment paper and press the mixture evenly onto the bottom. Place it in the freezer while you prepare the cheesecake topping.
- For the Filling: Rinse and drain the cashews and throw them in the food processor or high-speed blender with the rest of the ingredients. Blend until super smooth and pour on top of the crust. Place back into the freezer while you prepare the raspberry layer.
- For the Raspberry Chia Layer: Add raspberries to a small pot over medium-low heat. Let it simmer for about 2-3 minutes until raspberries are soft. Remove from heat, pour in the chia seeds and maple syrup and stir until it thickens. Let it cool down.
- Assemble: Spread the raspberry chia layer evenly on top and put it back into the freezer for 2-3 hours. Decorate with some fresh raspberries and enjoy. Store leftovers in the fridge for about a week or freeze for up to 3 months. Thaw in the fridge overnight or on the counter 15-30 minutes before serving.
Notes
- If you're short on time or forget to soak the cashews, bring water to a boil and cover the cashews with it for at least 15 minutes to help them soften faster. You can omit the soaking step altogether if using a high-powered blender like a Vitamix.
- If you don't like chia seeds, feel free to omit them and add a teaspoon of agar powder to thicken up the raspberry sauce as needed.

What’s the nutritional value per slice?
Hi Lucie, sorry, I don’t offer nutrition facts because they are so variable when it comes to home cooking. Also, I don’t believe they provide an accurate representation of the quality of food by just focusing on numbers. For instance, 2000 calories of vegetables, fruits, legumes, nuts, and seeds will affect the body in a completely different way than 2000 calories worth of fast food and soda – but if you only look at the numbers, you won’t see this difference.
can you use another nut other than cashews? thank you
Hi Giulia, macadamia nuts are the best substitute for cashews but they don’t absorb as much moisture. So you might have to add more to get the same texture. Hope this helps!